Cornhole Board Stencils and Layouts for a 24in x 48in Face
Dana Whitfield, Contributor
10 min read
You want a clean monogram or flag on plywood without freehanding it. Most cornhole board stencils in search results assume you already know where the 6in hole sits on a regulation face, and that gap is where layouts go wrong.
The short answer: Cornhole board stencils are reusable mylar or one-time vinyl masks sized for a regulation 24in x 48in playing face. Position art around the 6in hole centered 9in from the top edge and 12in from each side, per American Cornhole Association and American Cornhole League equipment specs. Use light paint loads, mask the cup zone, and seal with exterior polyurethane. For complex logos or matched sets, a coming designer preview beats repainting bleed.
| Reference | Measurement |
|---|---|
| Playing surface | 24in wide x 48in long |
| Hole diameter | 6in |
| Hole center from top edge | 9in |
| Hole center from left/right edge | 12in (centered width-wise) |
| Clearance above hole (top edge to hole top) | 6in |
| Clearance beside hole (side edge to hole edge) | 9in |
For the full tolerance breakdown, see our regulation cornhole board dimensions guide.
What cornhole board stencils are (and what they are not)
Cornhole board stencils are cut masks that let you paint a pattern without tracing freehand. Reusable versions are usually laser-cut 10 mil mylar, the material Designer Stencils and Go Stencil sell for full-face flags and chevrons. Their product copy describes a simple workflow: tape, paint, and peel.
One-time adhesive vinyl masks show up on Etsy under the same keyword. DIYDesignCo and similar sellers label them as stencils or decals. You paint through the cutout once, then remove the vinyl.
That is different from a hole template or routing jig. Crafted Elements sells a 9.5in x 9.5in acrylic guide with a 6.0in interior diameter and crosshairs marked for 9in from the top and 12in from the sides. Norfolk Wood Shop sells a similar layout jig. Those tools help you cut the cup during the build, not paint graphics around it.
Stencils are also not wraps or peel-and-stick decals. If you want a skin instead of brushed paint, read cornhole board wraps vs paint before you buy mylar.
Regulation layout grid for a 24in x 48in face
Every graphic stencil and layout grid starts from the same playing surface. According to American Cornhole Association equipment specifications, the face is 24in wide by 48in long with a 6in diameter hole. The American Cornhole League publishes its own equipment requirements with similar geometry and slightly different tolerances, which our dimensions guide covers in full.
On a regulation board, the hole center sits 9in down from the top edge and 12in in from each side edge. Table Games Hub's hole position calculator documents the resulting clearances: 6in from the top edge to the top of the hole, and 9in from each side edge to the side of the hole.
Picture a vertical line through the hole center, 12in in from each side edge, and a horizontal line through the center 9in down from the top edge. Flag layouts, chevrons, and split monograms usually sit in the lower two-thirds, leaving the upper band open for bag flight paths.
Where should the hole be on a cornhole board? Nine inches from the top edge, centered width-wise at 12in from each side, on a 24in x 48in face.
How big is the cornhole hole? Six inches in diameter, per ACA and ACL published equipment specs.
A common mismatch: tailgate boards with a 24in x 36in playing surface. Full-face stencils scaled for 48in length will look off-center on shorter boards. Confirm your face length before taping anything down.
Safe design zones when you stencil around the cup
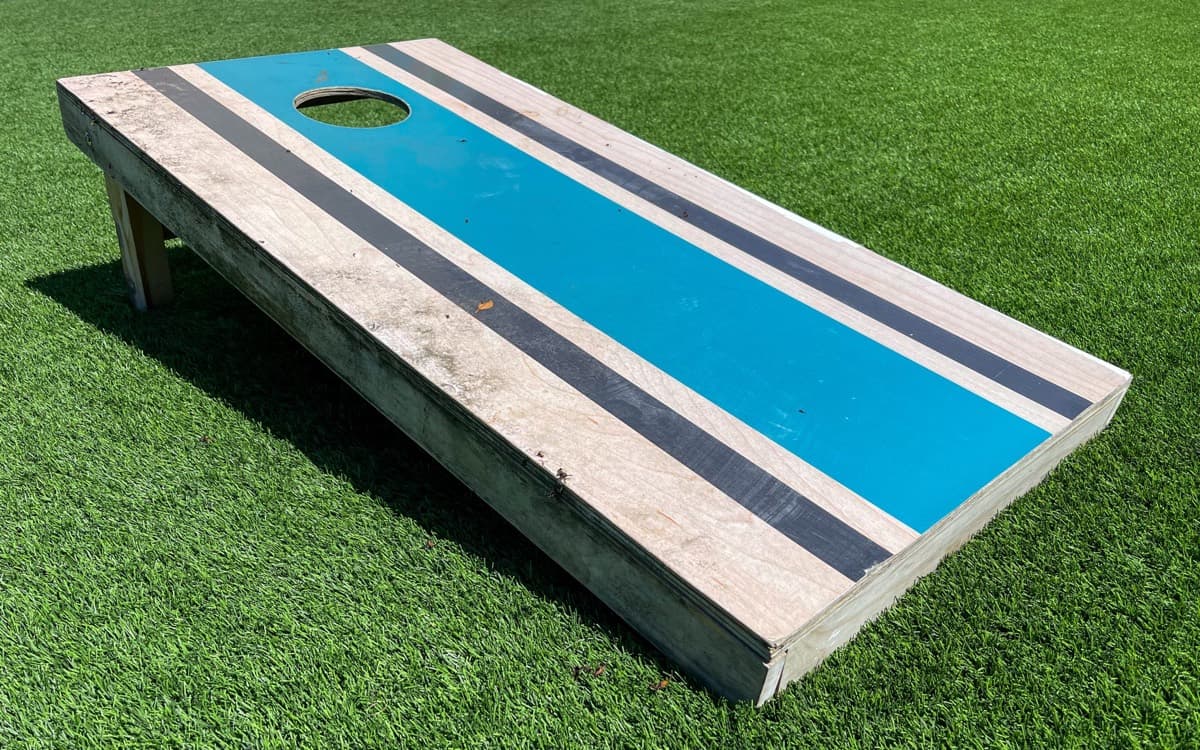
Keep fine text, thin script, and small logos out of the 6in diameter impact zone, plus a margin where bags land and skid. Bold patterns (USA flags, chevrons, tribal prints) handle bag wear better than delicate wedding script placed near the cup.
Many full-face designs use a horizontal band below the hole center line. That keeps the art readable while bags still have a clean approach from the front edge.
Scoreboard stencils are a different scale. Michaels sells a small mylar scoreboard stencil in the $13 to $17 range. Those hash marks belong on the lower face or rail, not across the hole opening.
For style direction once you know your zones, browse cornhole board design ideas. Wedding shoppers often want split monogram formats; see monogram cornhole board ideas for weddings for layout formats without repeating occasion planning here.
Types of cornhole stencils and when to use each
| Type | Material | Best for | Reuse | SERP price snapshot |
|---|---|---|---|---|
| Full-face pattern stencil | Laser-cut mylar | Flags, chevrons, lake themes | Many uses | $49.99–$69.99 (Designer Stencils) |
| Custom monogram stencil | Mylar or vinyl | Weddings, names, dates | Mylar yes; vinyl once | $5.95–$24.95 (Etsy) |
| Hole routing template | Acrylic jig | Cutting the 6in cup before paint | Permanent shop tool | Specialty woodworking retailers |
| Scoreboard stencil | Small mylar | Inning score hash marks | Yes | ~$13–$17 (Michaels) |
| DIY Cricut/Silhouette mask | Adhesive vinyl | One-off logos | No | Material cost only |
Reusable mylar pays off when you might repaint a second set or touch up after a season outdoors. Adhesive vinyl gives crisp edges for a single wedding weekend, then comes off.
A Reddit r/DIY thread on cornhole stencils suggests another route: apply a vinyl sticker, paint over it, and peel the sticker to leave a clean edge. Same bleed rules apply. Less paint, better lines.
Step-by-step: stenciling a regulation cornhole board
- Start with a plain or sanded face. Unfinished plywood or a pre-cut regulation top works. See plain cornhole boards if you are still choosing a substrate.
- Apply a base coat and let it cure fully. Cutting Edge Stencils' DIY tutorial warns that stenciling over a wet base smears the color underneath.
- Mark the hole center and layout grid in pencil. Mask the cup with paper or a hole template when you spray the background. Crafted Elements' acrylic guide aligns crosshairs at 9in from the top and 12in from the sides.
- Position the stencil. Optional repositionable spray adhesive on the back, plus painter's tape on outer edges. Designer Stencils recommends less paint on the brush or roller for sharper lines.
- Roll or dab with minimal paint. Offload excess on a paper towel. A dense foam roller or stencil brush works; stipple rather than flooding.
- Peel while the paint is still tacky. Touch up bleed with a small artist brush.
- Seal with exterior polyurethane. Two or three coats after the paint fully cures. Stenciled art still needs the same clear-coat protection as brushed graphics. Sheen affects bag slide; our wraps vs paint guide covers finish choices.
Poplolly Co.'s beginner painting guide shows a tape-only stripe method with Frog tape if you skip a purchased stencil entirely. Same layout grid applies.
Common stencil mistakes (and fixes)
| Mistake | What happens | Fix |
|---|---|---|
| Too much paint on roller | Bleed under mylar edges | Offload on paper towel; stipple lightly |
| Stencil on wet base coat | Smear and muddy color | Wait full cure time on the can label |
| Wrong board length | Pattern looks off-center | Confirm 48in face length before taping |
| No clear coat | Chipping and wrong slide | Exterior poly over fully cured paint |
| Intricate art at throwing distance | Monogram illegible from 27ft | Simplify letter count or plan vector art |
| Licensed sports logos | Trademark risk | Use original art or properly licensed files |
Stencils vs other ways to get art on a board
Vinyl wraps and decals go on fast with no paint bleed, but they are a different finish path. Compare durability and slide in cornhole board wraps vs paint.
Hand paint without a stencil works for simple stripes and blocks. Poplolly's tape method is enough for diagonal color blocks if you do not want to buy mylar.
Direct print on a regulation face is the long-term fix when stencil bleed keeps ruining a logo. The Cornhole Exchange designer, coming soon, will show artwork on a regulation tournament board with a birch or all-weather face. You will get a full preview, zoom, and shareable links before anything is built. Read what a custom cornhole board designer will let you preview for the planned scope, or visit the designer page for updates.
When to skip DIY stencils entirely: four or more matched sets for a brewery patio, corporate picnic, or league season. One mylar sheet drifts board to board. See DIY vs custom cornhole boards for the break-even point, and the corporate cornhole sets branding guide when identical logos matter more than a weekend project.
Matching art across league or taproom sets
A single reusable stencil works for one backyard set or a wedding pair. It gets harder when a taproom needs six boards with the same logo placement, or a league orders a dozen sets for sponsors.
Stencil drift shows up in small ways: tape shifted a quarter inch, paint load varied, or the mylar stretched after the third board. Color match across boards is another variable when you mix paint by eye.
Vector logo files (SVG or PDF) and a proof step beat repeating the same peel-and-paint session. That is the business case for direct print or a designer preview with shareable links your marketing contact can approve once. The corporate cornhole sets branding guide walks through repeatability for venues and events.
What to do after reading this
Mark your 24in x 48in grid, then choose cornhole board stencils in mylar or vinyl based on whether you will reuse the mask, and paint with a light hand. If the layout still feels guessy, start with cornhole board design ideas for patterns that fit the safe zones above. When bleed or scale keeps costing you repaints, the coming designer preview will show the finished face before you commit to art.