Cornhole Board Stain Designs: Grain, Contrast, and Durability
Cole Brennan, Contributor
13 min read
Grain-forward cornhole board stain designs look great in wedding photos and Reddit build threads. They fail fast when gel stain sits in dew without an exterior topcoat, or when tape lines cross the hole zone and leave a raised edge bags catch on. If you are shopping stained cornhole boards or planning a backyard build, the design choice and the finish stack matter as much as the color.
The short answer: Plan cornhole board stain designs on a sanded cabinet-grade birch or plywood face with an exterior-rated stain system and three to five thin clear coats. Favor wide two-tone borders and field-and-rail contrast over fine type in stain alone. Wait the full cure window before throwing bags. For taproom logos, wedding monograms, or six matching sets, UV-cured artwork direct-printed into birch or an all-weather face and sealed under marine-grade clear coat will hold detail hand stain cannot.
| Fact | Detail |
|---|---|
| Regulation face (ACL/ACA) | 24in x 48in playing surface; 6in hole centered 9in from the rear edge |
| Stain types | Penetrating oil, water-based exterior stain, gel stain (interior-only per General Finishes) |
| Design patterns | Two-tone border, chevron, triangle inlay, monogram negative space, team-color rails |
| Topcoat | Exterior spar urethane or Exterior 450-class waterborne poly; 3–5 thin coats |
| Slide note | Stain is translucent; grain texture stays visible. Do not confuse with opaque paint slide tuning |
| Cure | General Finishes Exterior 450 cites 7–10 days to full use; build forums suggest 48–72h minimum on oil/spar stacks before light play |
Why cornhole board stain designs read differently than paint
Stain adds translucent color. Paint adds opaque pigment. That single difference drives how cornhole board stain designs look and how long they last outdoors.
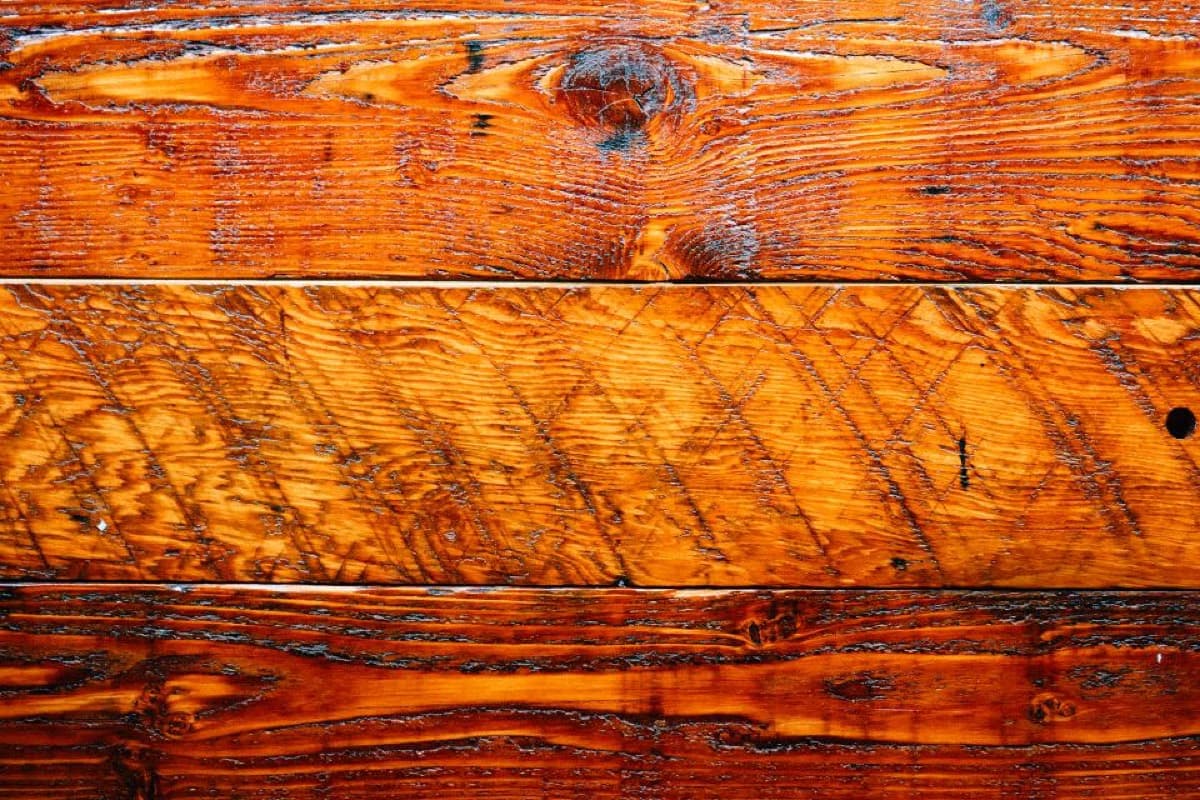
Under stain, wood grain, heartwood lines, and sapwood shifts stay visible. Contrast comes from the species you pick, how you sand it, and the tone of the stain next to it. A dark walnut rail beside a natural birch field reads clearly from 27ft because the grain pattern itself creates depth. Paint flattens that texture into a solid field, which is why opaque color paths behave differently on bag slide. For that comparison, see Painted Cornhole Board Designs That Hold Up Outdoors.
Durability is almost entirely topcoat-dependent. Stain penetrates the face; it is not a playing-surface finish on its own. Rain, UV, and bag friction attack the clear coat you put on top. Sherwin-Williams treats wood stain as a rustic accent in its cornhole project guide, pairing tintable Minwax stain with exterior latex fields and a waterborne sealer rather than relying on stain alone for outdoor life.
Stain design patterns that work on a 24in x 48in face
The American Cornhole Association publishes a 24in x 48in face with a 6in hole set 9in from the back edge. Every pattern below has to respect that layout, not just look good in a thumbnail.
| Pattern | Masking difficulty | Touch-up ease | Outdoor fade risk |
|---|---|---|---|
| Border stripe (dark rail, lighter field) | Low | High | Medium |
| Chevron or triangle inlay | Medium | Medium | Medium |
| Monogram negative space | Medium | Low | Medium |
| Rustic wedding (dark field, natural border) | Low | High | Medium to high on dark tones |
| Team-color rails | Low | High | Medium |
A border stripe is the most forgiving pattern for two-tone stained cornhole boards. Tape a straight rail, stain the field, re-tape, and hit the darker edge. It reads from across the yard without crossing the hole center. Chevron and triangle layouts show up on Cornhole Worldwide stained SKUs and in YouTube build videos, but keep tape geometry away from the hole rim so you do not build a lip bags hang on. For tape grids and monogram placement, see Cornhole Board Stencils and Layouts for a 24in x 48in Face.
Rustic wedding sets often pair a walnut or espresso field with a natural birch border. That look fits outdoor wedding timelines where photos matter more than tournament slide tuning. Brewery and tailgate buyers lean on team-color rails for brand recognition at the rail without filling the whole field. For six or more matching boards, hand-stain batches drift. That is where a built-to-order path with consistent wood-tone or artwork print makes more sense for business and taproom fleets.
Retail stained cornhole boards span a wide shelf. Cornhole Worldwide lists unfinished natural wood from $125 through premium stained hardwood sets at $224.99. cornhole.com's stained collection sits around $200–$210. Google's Popular Products carousel for these searches shows stained sets roughly from $175 to $400, and the ACA wood-grain collection runs $57–$298. Listings rarely say whether the face is true penetrating stain, a printed wood-grain wrap, or UV direct print under clear coat, so compare finish type, not price alone.
Best wood and prep for stain to pop
Birch plywood and clear pine plywood show grain well under stain. Soft pine blotch unless you use a pre-stain conditioner. GoSports specifies a 1/2in varnished cabinet-grade plywood top professionally stained dark brown on its regulation stained set, which matches what most DIY builders use.
Sand to 180 grit, then 220 grit. Wipe dust off completely. Optional pre-stain conditioner helps on blotchy species. If you are starting from a blank face, Plain Cornhole Boards: When a Blank Face Is the Right Call covers when natural wood is the better canvas. For species tradeoffs and void-free plywood picks, read Best Wood for Cornhole Boards and Wooden Cornhole Boards: Species, Sealers, and Outdoor Life.
Gel stain, oil, and water-based exterior stain compared
Craft Box Girls and other gel-stain tutorials push thick color for team shades. General Finishes documents its Oil Based Gel Stain as interior only and warns against oil-based finishes in direct outdoor water exposure. If you use gel stain on a garage build anyway, plan a full exterior spar urethane stack and covered storage, not year-round deck exposure.
| Stain type | Outdoor rating | Masking | Typical maker guidance | Recoat cadence |
|---|---|---|---|---|
| Gel stain | Interior-only (GF) | Excellent for tape lines | General Finishes; Craft Box Girls tutorials | Exterior spar stack required; shorter oil life outdoors |
| Penetrating oil stain + spar urethane | Common DIY path | Good with wipe technique | Reddit builders cite Varathane walnut + oil spar satin, 3 coats | Recoat every 1–3 years depending on exposure |
| Exterior 450-class waterborne stain + topcoat | Manufacturer-rated outdoor | Good | General Finishes Exterior 450 stain and matching topcoat | Manufacturer cites 3–5 years with proper care |
Reddit finish-order threads in the stained cornhole boards SERP often follow penetrating oil stain first, then three coats of oil-based spar urethane in satin. General Finishes Exterior 450 waterborne stain and topcoat pair UV absorbers and mildewcides in a system built for outdoor film. The topcoat label cites 7–10 days before full use.
Sealing stained boards for outdoor play
The best finish for cornhole boards after staining is three to five thin exterior clear coats, not one heavy flood coat. Seal the hole rim and every tape transition. Miss those edges and moisture creeps under the film.
Sheen affects bag slide. The ACA equipment standards allow a semi-gloss exterior latex slide band on painted faces. Stained faces still must stay sanded smooth with no play-disrupting blemishes and no post-manufacture foreign substances added for slide tuning. Tune slide with sheen and clear coat choice, not powders or additives after the fact.
Satin or semi-gloss stacks balance grip and glare. High-gloss-only faces can feel slick and pick up glare at afternoon cookouts. Boards stored outside year-round need exterior-rated stain and topcoat chemistry from the start. All-Weather vs Indoor-Only Cornhole Boards walks through that split. When a stained face chalks or fades, How to Care for and Store Your Cornhole Boards covers seasonal recoat and covered storage.
Stain plus paint hybrids and logo overlays
Reddit and Facebook finish threads debate order of operations constantly: stain then paint, or paint then stain. For a logo over a stained field, stain the base first, seal with a shellac barrier where the acrylic logo will sit, apply the logo, then run your exterior clear stack. Skipping the barrier invites bleed into open grain.
Stop trying to render fine type, crests, or sponsor marks in stain alone. Wide initials and negative-space monograms work. Brewery tap handles and corporate wordmarks do not. That is the point to switch to exterior latex on the field, or to a direct-print path.
Stain vs wrap vs direct print for fleets and weddings
Hand stain wins one-off rustic builds and groomsman gifts where grain variation is part of the charm. Vinyl wraps win a fast visual refresh when you need a new logo season without rebuilding. UV-cured direct print wins when you need the same wood-tone graphic or full-color artwork on six or more boards without batch drift.
The Cornhole Exchange will print artwork UV-cured directly into a regulation tournament board face (birch or all-weather) and seal it under marine-grade clear coat. A coming designer preview will show the full face with zoom and shareable links before ordering opens, as described in What a Custom Cornhole Board Designer Will Let You Preview. That path is built for logo fidelity hand stain cannot hold. For the full finish comparison against vinyl, see Cornhole Board Wraps vs Paint. For how the print stack is built, see Materials.
Common stain design mistakes
| Mistake | Result (or why it hurts) | Fix |
|---|---|---|
| Gel stain without exterior topcoat | Sticky or graying face after one season | Exterior-rated clear stack or covered storage only |
| Masking across the hole zone | Raised edge, bag hang-up | Lay out the hole first; use a stencil grid |
| Skipping conditioner on pine | Blotchy field | Pre-stain conditioner or switch to birch |
| Playing before cure | Bag tracks in soft film | 5–7+ days on waterborne exterior; 48–72h minimum on spar |
| Staining over sealed print areas | Peel at logo edge | Plan media path before color |
| Slide powders after stain | ACA rules violation on foreign substances | Tune slide with sheen and clear coat only |
Two-tone stain on a regulation face: step by step
- Sand to 180 grit, then 220 grit. Dust off. Apply pre-stain conditioner on soft pine if needed.
- Tape your border pattern on a 24in x 48in grid. Keep tape off the hole rim.
- Apply the lighter field stain. Wipe excess. Dry per the label dwell time.
- Re-tape for the darker rail stain. Wipe with the grain.
- Remove tape while the second coat is still tacky. Let stain cure fully.
- Apply three to five thin exterior clear coats. Lightly sand between coats.
- Wait the full cure window before play. Store under cover when not in use.
What to do after reading this
Pick your pattern against the masking table above, then match stain chemistry to where the set will live. If the design is a wide border and a wedding date, a hand-stained build can look great. If the design is a taproom logo across six boards, start with materials and print specs instead of mixing another batch of gel stain.
When you want style ideas after you know which patterns survive outdoor play, browse 25 Cornhole Board Design Ideas for Your Next Cookout for inspiration without repeating the durability math here.